# LangGraph tutorial: build a ReAct agent with the v1.0 API
> Source: https://agentsindex.ai/blog/langgraph-tutorial
Tutorial [Agent tools and integrations](https://agentsindex.ai/categories/agent-tools-and-integrations)
A step-by-step LangGraph tutorial on the stable v1.0 API: build a working ReAct agent with state, nodes, edges and checkpointing.
[Team AgentsIndex](https://agentsindex.ai/authors/agentsindex) Published 12 Apr 2026 Updated 4 Oct 2026 22 min read [Editorial policy](https://agentsindex.ai/editorial-policy)
On this page
1. [How do you use LangGraph in Python?](#how-do-you-use-langgraph-in-python)
2. [What are nodes and edges in LangGraph?](#what-are-nodes-and-edges-in-langgraph)
3. [Frequently Asked Questions](#frequently-asked-questions)
4. [How does state work in LangGraph?](#how-does-state-work-in-langgraph-1)
5. [StateGraph or create_react_agent: which path should you take?](#stategraph-or-create_react_agent-which-path-should-you-take)
6. [What is LangGraph and how do I get started with it?](#what-is-langgraph-and-how-do-i-get-started-with-it)
7. [How do I build a working LangGraph ReAct agent from scratch?](#how-do-i-build-a-working-langgraph-react-agent-from-scratch)
8. [What are the best ways to add memory and checkpointing to my LangGraph agent?](#what-are-the-best-ways-to-add-memory-and-checkpointing-to-my-langgraph-agent)
9. [How can I visualize my LangGraph graph?](#how-can-i-visualize-my-langgraph-graph)
10. [What changed from LangGraph v0.1 to v1.0?](#what-changed-from-langgraph-v01-to-v10)
11. [Frequently Asked Questions](#frequently-asked-questions-1)
12. [What have we learned about LangGraph?](#what-have-we-learned-about-langgraph)
- [This page as Markdown](https://agentsindex.ai/blog/langgraph-tutorial.md)
You searched for a LangGraph tutorial and found ten articles. Nine of them use `set_entry_point()`, a function deprecated two years ago. If you’ve tried following those guides and hit import errors or broken behavior, that’s why.
This tutorial uses the stable LangGraph v1.0 API throughout. Every code block runs. We’ll go from a blank Python file to a working ReAct agent with tool calling and persistent memory, using the patterns that actually work today.
**LangGraph is an open-source Python library for building stateful AI agent workflows as directed graphs.** Developed by LangChain Inc. and reaching stable v1.0 in October 2025, LangGraph models agent execution as **nodes** (computation steps) connected by **edges** (control flow) sharing a common **State** object. The [LangGraph GitHub repository has over 42,600 stars](https://github.com/langchain-ai/langgraph). Many LangGraph tutorials still in circulation use deprecated v0.1 API patterns, including `set_entry_point()` and pre-`MessagesState` TypedDict definitions, instead of the v1.0 canonical patterns this one uses throughout.
That’s not a minor inconvenience. ChatGPT reached [900 million weekly active users in February 2026](https://en.wikipedia.org/wiki/ChatGPT), and AI assistants are an increasingly common way developers find tutorials like this one. When the answers those platforms serve are based on deprecated patterns, every developer who follows them hits the same broken imports.
[Companies including Replit, Klarna, LinkedIn and Uber adopted the framework](https://techstrong.ai/agentic-ai/langgraph-0-3-expanding-the-ecosystem-with-prebuilt-agents/) in early production agent workflows, per Techstrong.ai’s coverage of the LangGraph 0.3 release.
If you’re still deciding whether LangGraph suits your project, our guide on [how to choose an AI agent framework](https://agentsindex.ai/blog/how-to-choose-ai-agent-framework) covers the decision criteria. If you’ve already made the call, keep reading.
> **TL;DR:** This tutorial uses LangGraph v1.0 (stable, October 2025), all code is tested and current. Build a working ReAct agent with `StateGraph`, `MessagesState`, and `create_react_agent`.
## How do you use LangGraph in Python?
LangGraph in Python uses `StateGraph` to define agent workflows. Install with `pip install langgraph langgraph-prebuilt langchain-openai`. Import `StateGraph`, `START`, `END` from `langgraph.graph`. Define your state as a TypedDict, add nodes as Python functions with `add_node()`, connect them with `add_edge()`, then call `compile()`. Invoke the finished graph with `graph.invoke({'messages': [...]})`.
### Installation and environment setup
LangGraph 1.0 requires Python 3.10 or higher, support for 3.8 and 3.9 was dropped in the 1.x major release. Run the following to install everything you need for this tutorial:
```
pip install langgraph langgraph-prebuilt langchain-openai langchain-core python-dotenv
```
Create a `.env` file in your project root with your API key. LangGraph is model-agnostic, it works with Anthropic, Google Gemini, Groq, and any provider with a LangChain-compatible wrapper, but this tutorial uses OpenAI for simplicity:
```
OPENAI_API_KEY=your-key-here
```
Load it at the top of your script:
```
from dotenv import load_dotenv
load_dotenv()
```
That’s the complete setup. No additional services, no configuration files, no dependencies beyond what’s listed. The LangChain documentation describes [LangGraph as “very low-level, and focused entirely on agent orchestration”](https://docs.langchain.com/oss/python/langgraph/overview), which is why getting the imports right from the start matters. The library executes exactly what you define, nothing more.
### Your first three imports
Every LangGraph script you write will start with some version of these three lines. They replace the deprecated patterns you’ll see in most tutorials:
```
from langgraph.graph import StateGraph, START, END
from langgraph.graph.message import MessagesState
from langgraph.prebuilt import create_react_agent
```
`START` and `END` are sentinel nodes built into LangGraph that represent the entry and exit points of your graph. Any graph that uses `set_entry_point()` or `set_finish_point()` is using the old v0.1 API.
The table below maps the most common deprecated patterns to their current equivalents.
| Old code (v0.1) | Current code (v1.0) | Why it changed |
| --- | --- | --- |
| `set_entry_point('node')` | `add_edge(START, 'node')` | START/END sentinels make graph topology explicit and composable |
| `set_finish_point('node')` | `add_edge('node', END)` | Same reason; finish point was redundant with a terminal edge |
| Manual TypedDict with messages list | `MessagesState` from `langgraph.graph.message` | Prebuilt state includes the `add_messages` reducer by default |
| `from langgraph.prebuilt import ToolExecutor` | `from langgraph.prebuilt import ToolNode` | `ToolNode` replaced `ToolExecutor` in v0.2; `ToolExecutor` is removed in v1.0 |
## What are nodes and edges in LangGraph?
In LangGraph, **nodes** are Python functions that perform computation, LLM calls, tool invocations, or data transformations. **Edges** define the execution order between nodes. Simple edges use `add_edge('node_a', 'node_b')`. Conditional edges use `add_conditional_edges()` to route based on current state, enabling branching and loops in agent workflows.
### Defining a node
A node is any Python function that takes the current graph state and returns a dictionary of updates. The simplest possible node, a direct LLM call, looks like this:
```
from langgraph.graph import StateGraph, START, END
from langgraph.graph.message import MessagesState
from langchain_openai import ChatOpenAI
model = ChatOpenAI(model="gpt-4o-mini")
def call_llm(state: MessagesState) -> dict:
response = model.invoke(state["messages"])
return {"messages": [response]}
```
The function receives the full state, does its work, and returns only what changed. LangGraph merges those updates back into the shared state before passing it to the next node. You don’t return the entire state object, just the fields that changed.
### Connecting nodes with edges
Unconditional edges always route from one node to the next. Conditional edges evaluate a function against the current state and route to different nodes based on the result. Here’s a minimal graph using both:
```
builder = StateGraph(MessagesState)
builder.add_node("llm", call_llm)
builder.add_edge(START, "llm")
builder.add_edge("llm", END)
graph = builder.compile()
```
### Visualizing your graph
After compiling any graph, you can generate a Mermaid diagram of its structure with one line. This is one of the most useful debugging tools in LangGraph and most tutorials skip it entirely:
```
print(graph.get_graph().draw_mermaid())
```
For the simple LLM graph above, the output looks like this:
```
graph TD;
__start__ --> llm;
llm --> __end__;
```
Paste that into [mermaid.live](https://mermaid.live) to render a visual flow diagram. For complex graphs with conditional edges and multiple nodes, this makes it immediately clear whether your topology matches your intent, before you run a single inference call.
For conditional routing, `add_conditional_edges()` accepts a source node, a condition function returning a string key, and a path map dictionary. This API is unchanged from v0.1 through v1.0.
```
def should_continue(state: MessagesState) -> str:
last_message = state["messages"][-1]
if hasattr(last_message, "tool_calls") and last_message.tool_calls:
return "tools"
return "__end__"
builder.add_conditional_edges("llm", should_continue, {
"tools": "tool_node",
"__end__": END
})
```
The path map dictionary translates return values from the condition function into actual node names. Your routing logic stays clean, the function returns a simple string, and the map handles where that string leads.
## Frequently Asked Questions
### How do you use LangGraph in Python?
LangGraph in Python uses `StateGraph` to define agent workflows. Install with `pip install langgraph langgraph-prebuilt`. Import `StateGraph`, `START`, and `END` from `langgraph.graph`. Define your state as a TypedDict, add nodes as Python functions with `add_node()`, connect them with `add_edge()`, then call `compile()`. Invoke the finished graph with `graph.invoke({'messages': [...]})`.
### What is the difference between LangChain and LangGraph?
LangChain is a framework for building LLM-powered chains and pipelines. LangGraph is a separate library built on LangChain specifically for stateful, multi-step AI agents modeled as graphs. Use LangChain for simple sequential prompts; use LangGraph when your agent needs loops, branching, persistent state, or human-in-the-loop checkpoints. The two libraries are complementary, not competing.
### What are nodes and edges in LangGraph?
In LangGraph, **nodes** are Python functions that perform computation, LLM calls, tool invocations, or data transformations. **Edges** define the execution order between nodes. Simple edges use `add_edge('node_a', 'node_b')`. Conditional edges use `add_conditional_edges()` to route based on the current state, enabling branching and loops in agent workflows.
### How does state work in LangGraph?
LangGraph state is a shared TypedDict or Pydantic model passed between every node in the graph. Each node reads the current state and returns a dict of updates. For conversation agents, `MessagesState` uses the `add_messages` reducer, instead of replacing the messages list, new messages are appended, preserving conversation history across all nodes throughout execution.
### What is create_react_agent in LangGraph?
`create_react_agent` is a prebuilt helper in `langgraph.prebuilt` that builds a complete ReAct (Reason + Act) agent graph automatically. It handles the LLM call, tool execution loop, and conditional routing without requiring manual `StateGraph` setup. Use it for standard tool-calling agents. Import with: `from langgraph.prebuilt import create_react_agent`.
## How does state work in LangGraph?
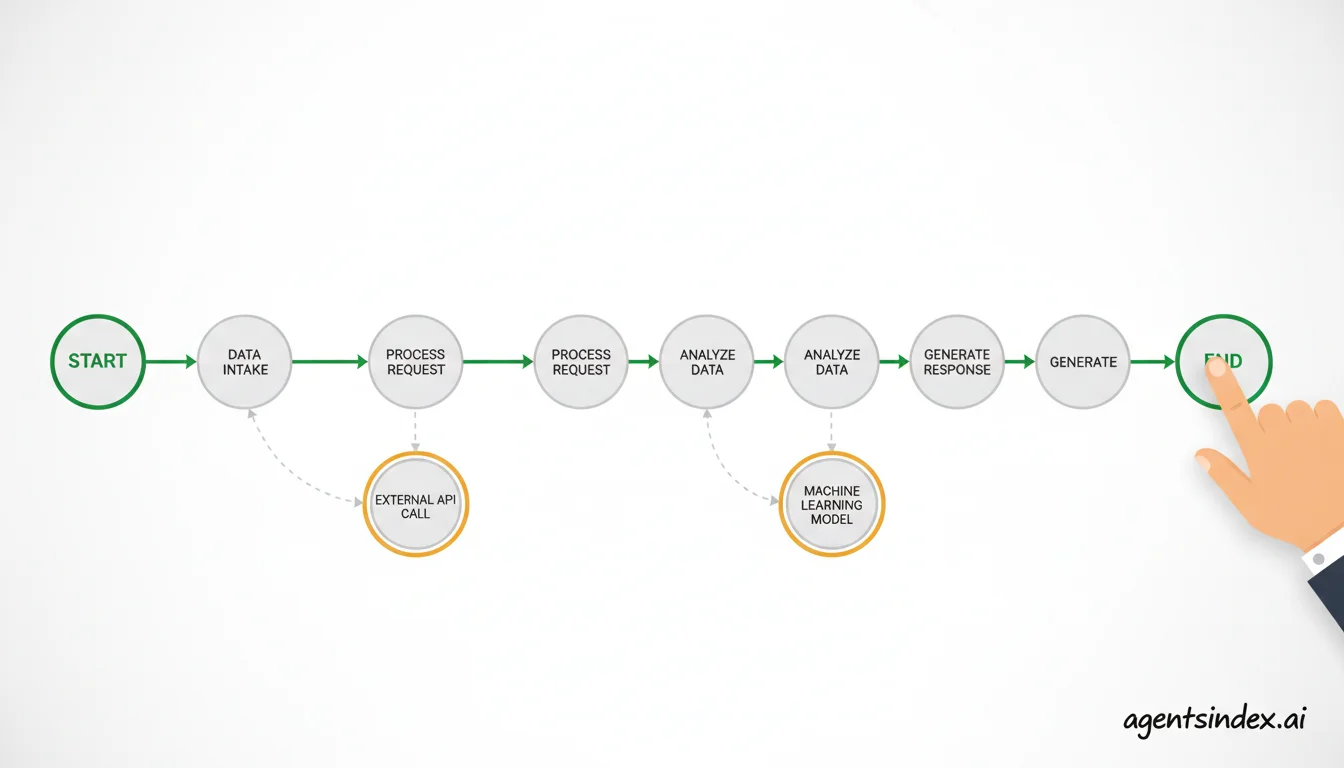
LangGraph state is a shared TypedDict or Pydantic model passed between every node in the graph. Each node reads the current state and returns a dict of updates. For conversation agents, **MessagesState** uses the `add_messages` reducer, instead of replacing the messages list, new messages are appended, preserving full conversation history across all nodes.
### The part most tutorials skip: state reducers
Here’s something almost every LangGraph tutorial glosses over. What does the `Annotated[list, add_messages]` pattern actually mean? Why is there a second argument?
```
from typing import Annotated
from langgraph.graph.message import add_messages
from typing_extensions import TypedDict
class MyState(TypedDict):
messages: Annotated[list, add_messages]
```
The second argument to `Annotated`, `add_messages`, is a **reducer**. Reducers tell LangGraph how to merge updates when a node returns new data. Without a reducer, a node returning `{"messages": [new_message]}` would overwrite the entire messages list with a list containing only the new message. With `add_messages`, new messages are appended to the existing list instead.
Every time you see `Annotated[list, something]` in a LangGraph state definition, that second argument controls how the field gets updated. Other common reducers include Python’s `operator.add` for numeric accumulation. The pattern is consistent: annotate the type, specify the merge behavior.
### MessagesState: the prebuilt option
For most agent use cases, you don’t need to define state manually. `MessagesState` from `langgraph.graph.message` already includes the correct `Annotated[list, add_messages]` definition:
```
from langgraph.graph.message import MessagesState
# MessagesState is equivalent to defining:
# class MessagesState(TypedDict):
# messages: Annotated[list, add_messages]
```
### When to use custom state
Custom state is useful when your agent needs to track additional data alongside the conversation. A few real examples: a running token cost counter, a list of URLs already visited in a research agent, a structured output object being assembled across multiple nodes. Define your own TypedDict and add whatever fields you need:
```
from typing import Annotated
from langgraph.graph.message import add_messages
from typing_extensions import TypedDict
class ResearchState(TypedDict):
messages: Annotated[list, add_messages]
visited_urls: list[str]
total_tokens_used: int
```
Nodes that update `visited_urls` return a new list to replace it (no reducer, so it overwrites). Nodes that touch `messages` use the `add_messages` reducer to append. Both fields live in the same state object, accessible to every node.
## StateGraph or create_react_agent: which path should you take?
Every LangGraph learner hits the same fork: build a graph manually with `StateGraph`, or use `create_react_agent` from the prebuilt package. LangGraph v0.3 introduced the `langgraph-prebuilt` package containing `create_react_agent` as a high-level abstraction built on top of the core `StateGraph` primitive, without breaking existing APIs. Neither path is wrong. They solve different problems.
The LangChain team designed this two-level system deliberately: full control when you need it, reasonable defaults when you don’t. As the official documentation puts it, LangGraph “gives developers full control of agent logic while still providing prebuilt abstractions for common patterns.”
| Feature | StateGraph (manual) | create_react_agent (prebuilt) |
| --- | --- | --- |
| Best for | Custom flows, multi-agent systems, parallel branches | Standard tool-calling agents, prototyping |
| Lines of code (basic agent) | 30 to 60+ lines | 5 to 10 lines |
| Custom routing logic | Full control via add_conditional_edges() | Built-in ReAct loop only |
| Built-in ReAct loop | You build it manually | Included automatically |
| State customization | Any TypedDict or Pydantic model | MessagesState by default, extendable |
| Human-in-the-loop support | Full support with interrupt() | Partial support via interrupt_before/after |
| When to choose | Non-standard flows, supervisor agents, production systems needing custom control | Standard tool-calling, quick prototypes, learning the basics |
**A note on where this fits today:** `langgraph.prebuilt.create_react_agent` still works exactly as shown in this tutorial, LangGraph 1.x keeps it for backward compatibility, but as of the v1.0 release it’s marked deprecated in favor of `create_agent` in the separate `langchain.agents` package, which wraps the same `ToolNode`-based loop with a middleware system on top. If you’re starting a new project today, look at [`langchain.agents.create_agent`](https://docs.langchain.com/oss/python/langchain/agents) first. The `StateGraph` and `create_react_agent` patterns below remain accurate and functional, and are worth knowing regardless, since `create_agent` is built on the same primitives.
The practical rule: start with `create_react_agent` for any standard tool-calling agent, or evaluate `langchain.agents.create_agent` if you’re starting fresh. If you find yourself needing parallel node execution, a supervisor-worker pattern, custom retry logic, or complex branching, migrate to a manual `StateGraph`. The underlying primitives are identical either way, the prebuilt helpers are syntactic sugar over the same graph mechanics.
One commenter in the r/LangChain thread ranking third on Google for “langgraph tutorial” put it plainly: “The documentation is not very friendly to beginners.” That friction is real, and most of it comes from tutorials that drop readers into manual `StateGraph` construction before explaining when the prebuilt path is sufficient.
For a head-to-head look at how LangGraph’s design philosophy compares to alternative frameworks, see our [CrewAI vs LangGraph comparison](https://agentsindex.ai/blog/crewai-vs-langgraph). For a broader survey of available options, [Agent Frameworks on AgentsIndex](https://agentsindex.ai/categories/agent-frameworks) indexes the full ecosystem.
## What is LangGraph and how do I get started with it?
[https://www.youtube.com/watch?v=jGg\_1h0qzaM](https://www.youtube.com/watch?v=jGg%5C_1h0qzaM)
## How do I build a working LangGraph ReAct agent from scratch?
The fastest path to a working agent uses `create_react_agent`. This walkthrough builds a complete agent with two math tools from scratch. Every import is included, copy and run this directly.
### Step 1: Define your tools
LangGraph tools are standard Python functions decorated with `@tool` from LangChain core. The function’s docstring becomes the description the LLM uses to decide when to call the tool:
```
from langchain_core.tools import tool
@tool
def multiply(a: float, b: float) -> float:
"""Multiply two numbers together."""
return a * b
@tool
def add(a: float, b: float) -> float:
"""Add two numbers together."""
return a + b
tools = [multiply, add]
```
Keep docstrings clear and specific. Vague descriptions lead to missed tool calls. The LLM reads these at runtime to decide which tool fits the user’s request.
### Step 2: Build the agent with create_react_agent
`create_react_agent` takes an LLM instance and a list of tools. It builds the full ReAct graph, LLM call, tool execution loop, conditional routing, automatically:
```
from langchain_openai import ChatOpenAI
from langgraph.prebuilt import create_react_agent
model = ChatOpenAI(model="gpt-4o-mini")
agent = create_react_agent(model, tools)
```
Two lines. The agent handles the reason-act-observe loop, routes tool call results back through the LLM, and knows when to stop. What used to take 40 lines of boilerplate in v0.1 is now this.
### Step 3: Run the agent
Call `.invoke()` with a messages list. The input format matches the standard LangChain messages API:
```
from langchain_core.messages import HumanMessage
result = agent.invoke({
"messages": [HumanMessage(content="What is 47 multiplied by 83?")]
})
print(result["messages"][-1].content)
# Output: 47 multiplied by 83 is 3,901.
```
The result contains the full messages list: the original human message, the LLM’s tool call request, the tool’s response, and the final LLM answer. Inspect `result["messages"]` to see the complete trace.
### Step 4: The equivalent manual StateGraph (for understanding)
Here’s what `create_react_agent` builds internally. Reading this helps when you need to extend or debug the prebuilt version:
```
from langgraph.graph import StateGraph, START, END
from langgraph.graph.message import MessagesState
from langgraph.prebuilt import ToolNode
from langchain_openai import ChatOpenAI
model_with_tools = ChatOpenAI(model="gpt-4o-mini").bind_tools(tools)
tool_node = ToolNode(tools)
def call_model(state: MessagesState) -> dict:
response = model_with_tools.invoke(state["messages"])
return {"messages": [response]}
def should_continue(state: MessagesState) -> str:
last_msg = state["messages"][-1]
if hasattr(last_msg, "tool_calls") and last_msg.tool_calls:
return "tools"
return "__end__"
builder = StateGraph(MessagesState)
builder.add_node("agent", call_model)
builder.add_node("tools", tool_node)
builder.add_edge(START, "agent")
builder.add_conditional_edges("agent", should_continue, {
"tools": "tools",
"__end__": END
})
builder.add_edge("tools", "agent")
graph = builder.compile()
```
Both implementations produce identical behavior. The `create_react_agent` version is shorter; the manual version is more readable for learning purposes.
### Visualizing your graph structure
After compiling any graph, you can print its structure as a Mermaid diagram. This is useful for debugging routing logic and for sharing architecture diagrams with teammates.
```
print(graph.get_graph().draw_mermaid())
```
Running that on the manual ReAct agent above produces output like this:
```
graph TD;
__start__ --> agent;
agent --> tools;
agent --> __end__;
tools --> agent;
```
Paste that into any Mermaid renderer, such as [mermaid.live](https://mermaid.live), to get an interactive diagram. The method works on any compiled `StateGraph`, including `create_react_agent` outputs. When you need to add human-in-the-loop interrupts, custom pre-processing nodes, or parallel tool execution, you’ll expand on the manual pattern.
## What are the best ways to add memory and checkpointing to my LangGraph agent?
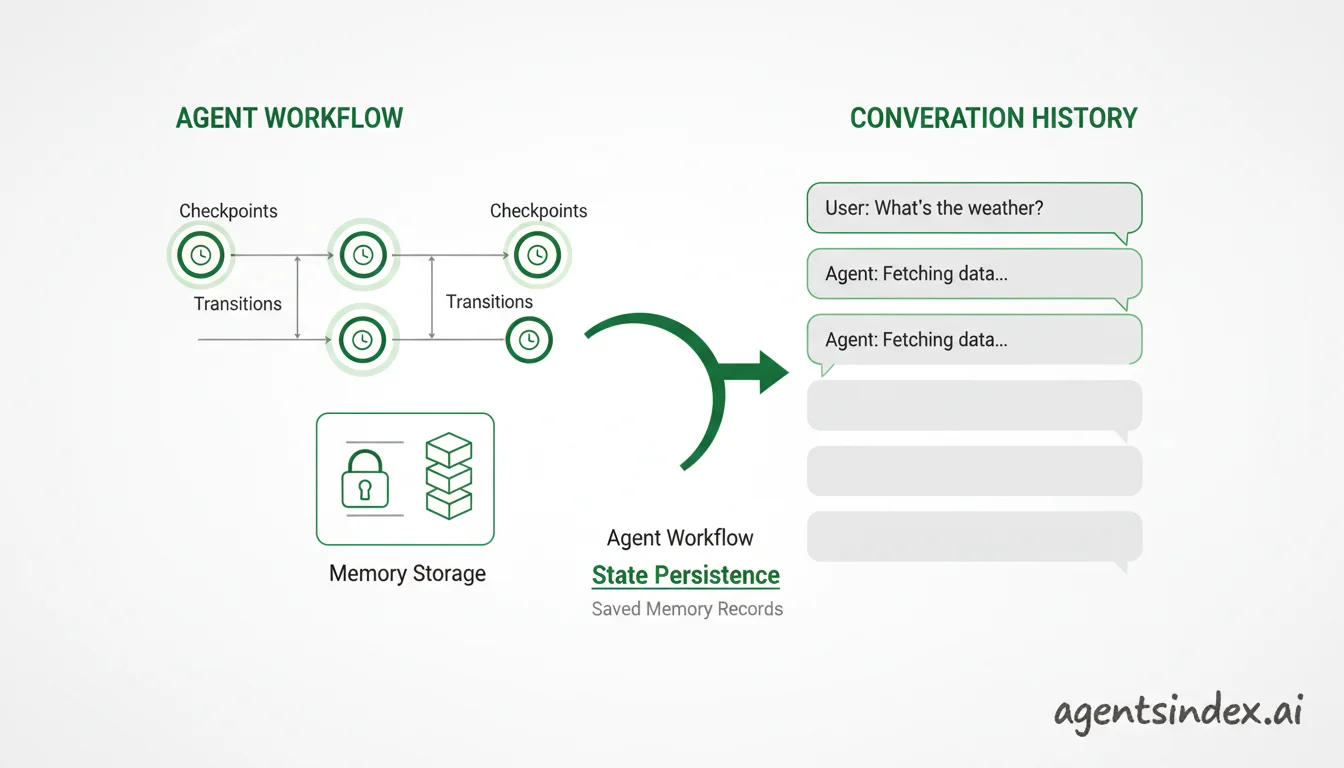
A stateless agent forgets the entire conversation after each `.invoke()` call. LangGraph’s checkpointing system solves this by saving graph state after every node execution, enabling multi-turn memory, fault-tolerant workflows, and human-in-the-loop interrupts. Checkpointing is the foundation that observability and tracing tools like LangSmith build on.
### Adding MemorySaver for local development
`MemorySaver` stores state in Python in-process memory. It’s the fastest way to add conversation memory during development and testing:
```
from langgraph.checkpoint.memory import MemorySaver
from langgraph.prebuilt import create_react_agent
from langchain_openai import ChatOpenAI
from langchain_core.messages import HumanMessage
model = ChatOpenAI(model="gpt-4o-mini")
checkpointer = MemorySaver()
agent = create_react_agent(model, tools, checkpointer=checkpointer)
# thread_id scopes the conversation, use a unique ID per user session
config = {"configurable": {"thread_id": "user-session-001"}}
result1 = agent.invoke(
{"messages": [HumanMessage(content="My name is Alex.")]},
config=config
)
result2 = agent.invoke(
{"messages": [HumanMessage(content="What is my name?")]},
config=config
)
print(result2["messages"][-1].content)
# Output: Your name is Alex.
```
The `thread_id` in config scopes state to a specific conversation. Using the same `thread_id` across calls replays the full conversation history before processing the new message. Using a different `thread_id` starts a fresh session with no memory of previous exchanges.
**Production warning: MemorySaver is for development only.** `MemorySaver` stores state in Python in-memory dictionaries and loses all conversation history on process restart. Production deployments require `SqliteSaver` for local persistence or `AsyncPostgresSaver` for cloud deployments. Shipping `MemorySaver` to production is one of the most common mistakes in early LangGraph deployments, users lose their session context every time the server restarts.
### Switching to SqliteSaver for persistent local storage
Migrating from `MemorySaver` to `SqliteSaver` needs one extra package, since the SQLite checkpoint backend ships separately from core `langgraph`:
```
pip install langgraph-checkpoint-sqlite
```
`SqliteSaver.from_conn_string()` is a context manager, not a plain constructor, use it with `with` so the underlying connection opens and closes correctly:
```
from langgraph.checkpoint.sqlite import SqliteSaver
with SqliteSaver.from_conn_string("agent_memory.db") as checkpointer:
agent = create_react_agent(model, tools, checkpointer=checkpointer)
# invoke the agent inside this block; the connection closes when it exits
```
The `agent_memory.db` file persists across process restarts. For cloud deployments at scale, replace this with `AsyncPostgresSaver` (from the `langgraph-checkpoint-postgres` package) using a managed Postgres connection string. For hosted deployment with automatic scaling and built-in persistence, [LangGraph Platform](https://agentsindex.ai/langgraph-platform) handles the infrastructure. For production monitoring and trace visualization, [LangSmith](https://agentsindex.ai/langsmith) integrates natively with LangGraph.
## How can I visualize my LangGraph graph?
After compiling your graph, you can inspect its full structure using the built-in Mermaid visualization. It requires no additional dependencies beyond the core `langgraph` package.
Graph visualization is available via `graph.get_graph().draw_mermaid()`, which returns a Mermaid diagram string:
```
# After compiling your graph
graph = builder.compile()
# Get the Mermaid diagram as a string
mermaid_str = graph.get_graph().draw_mermaid()
print(mermaid_str)
```
For the ReAct agent we built earlier with `agent` and `tools` nodes, the output looks like this:
```
%%{init: {'flowchart': {'curve': 'linear'}}}%%
graph TD;
__start__([__start__
]):::first
agent([agent])
tools([tools])
__end__([__end__
]):::last
__start__ --> agent;
agent -.-> tools;
agent -.-> __end__;
tools --> agent;
classDef default fill:#f2f0ff,line-height:1.2;
classDef first fill-opacity:0;
classDef last fill:#bfb6fc;
```
Paste that into any Mermaid renderer, mermaid.live, VS Code’s Mermaid plugin, or a Jupyter notebook with the mermaid extension, to see your graph as a flow diagram. The dashed lines represent conditional edges: the `agent` node can route to either `tools` or `__end__` depending on whether the LLM returned tool calls.
### PNG output for Jupyter notebooks
For richer output in Jupyter, use `draw_mermaid_png()` to render the diagram directly:
```
from IPython.display import Image, display
# Render the graph as a PNG in a Jupyter notebook
display(Image(graph.get_graph().draw_mermaid_png()))
```
Make graph visualization a standard part of your development workflow. Complex graphs with multiple conditional branches are far easier to debug visually than by reading node and edge definitions. If the flow diagram doesn’t match your mental model of how the agent should behave, you’ve found your bug before running a single inference call.
## What changed from LangGraph v0.1 to v1.0?
[LangGraph reached stable LTS release in October 2025](https://docs.langchain.com/oss/python/release-policy), per the LangChain Python Release Policy documentation. LangGraph 0.x enters maintenance mode and remains supported until December 2026, which is why v0.1 code still appears in production codebases and most online tutorials. Most top-ranked tutorials for “langgraph tutorial” still use deprecated v0.1 API patterns including `set_entry_point()` and pre-MessagesState TypedDict definitions.
Here’s a direct comparison of the specific patterns that changed between versions:
| What you’re changing | Old code (v0.1, deprecated) | Current code (v1.0) | Why it changed |
| --- | --- | --- | --- |
| Graph entry point | `builder.set_entry_point("node")` | `builder.add_edge(START, "node")` | Unified edge API, entry point is just an edge from the START sentinel |
| Graph finish point | `builder.set_finish_point("node")` | `builder.add_edge("node", END)` | Same unified edge API applies to exit as well |
| Message state definition | Custom TypedDict with raw BaseMessage list | `from langgraph.graph.message import MessagesState` | Prebuilt state with the correct add_messages reducer included |
| ReAct agent pattern | Hand-rolled agent loop (20 to 40 lines) | `from langgraph.prebuilt import create_react_agent` | Prebuilt package introduced in v0.3 for standard patterns |
| Tool execution node | Custom tool execution function per tool | `from langgraph.prebuilt import ToolNode` | Prebuilt ToolNode handles all tool calling boilerplate |
| Conditional routing | `add_conditional_edges()` | `add_conditional_edges()` | Unchanged, stable from v0.1 through v1.0, no migration needed |
The good news about migrating existing code: `add_conditional_edges()` is completely unchanged from v0.1 through v1.0. If you have existing conditional routing logic, it works as-is. The main migration work is replacing `set_entry_point()` and `set_finish_point()` with explicit `add_edge(START,...)` and `add_edge(..., END)` calls, and updating state definitions to use `MessagesState` instead of manually-defined TypedDicts with BaseMessage sequences.
One more migration worth knowing about even though it’s outside the v0.1-to-v1.0 scope of this table: `langgraph.prebuilt.create_react_agent` and `ToolNode` are themselves now marked deprecated in favor of `create_agent` in the `langchain.agents` package, covered above in the StateGraph-vs-prebuilt section. They still work, LangGraph 1.x keeps the whole `langgraph.prebuilt` module for backward compatibility, but it’s the direction the ecosystem is moving next.
For teams evaluating LangGraph’s ecosystem alongside alternative Python frameworks, the [best AI agent frameworks guide](https://agentsindex.ai/blog/best-ai-agent-frameworks) compares options by production readiness, community size, and use-case fit. [AutoGen](https://agentsindex.ai/autogen) takes a different architectural approach to multi-agent coordination that’s worth understanding before committing to LangGraph for complex [multi-agent systems](https://agentsindex.ai/blog/multi-agent-systems).
## Frequently Asked Questions
### What is the difference between LangChain and LangGraph?
LangChain is a framework for building LLM-powered chains and pipelines. LangGraph is a separate library built on LangChain specifically for stateful, multi-step AI agents modeled as graphs. Use LangChain for simple sequential prompts; use LangGraph when your agent needs loops, branching, persistent state, or human-in-the-loop checkpoints. The two libraries are complementary, not competing.
### What is create_react_agent in LangGraph?
`create_react_agent` is a prebuilt helper in `langgraph.prebuilt` that builds a complete ReAct (Reason and Act) agent graph automatically. It handles the LLM call, tool execution loop, and conditional routing without requiring manual `StateGraph` setup. Use it when you need a standard tool-calling agent. Import with: `from langgraph.prebuilt import create_react_agent`.
### Does LangGraph work with models other than OpenAI?
Yes. LangGraph is model-agnostic and works with any LLM that has a LangChain-compatible wrapper. Tested providers include Anthropic Claude, Google Gemini, Groq, Mistral AI, and local models via Ollama. Replace `ChatOpenAI` with the corresponding provider’s chat model class. The graph logic, state management, and checkpointing work identically regardless of the underlying model provider.
### How do I debug a LangGraph agent that’s not behaving correctly?
Start with graph visualization, call `graph.get_graph().draw_mermaid()` to confirm the graph structure matches your intent. Then use `graph.stream()` instead of `.invoke()` to see intermediate node outputs in real time as each node executes. For production debugging, LangSmith provides full trace visualization for every node execution, tool call, and state transition in your LangGraph workflow.
### What is the best way to deploy a LangGraph agent to production?
For local production use `SqliteSaver` as your checkpointer for state persistence across restarts. For cloud production use `AsyncPostgresSaver` with a managed Postgres database. LangGraph Platform provides a hosted deployment environment with automatic scaling, built-in persistence, and a REST API out of the box. Never use `MemorySaver` in production, it loses all state on process restart.
## What have we learned about LangGraph?
LangGraph’s learning curve is real. The official documentation acknowledges it requires deliberate study before building complex systems, and the ecosystem of outdated tutorials hasn’t made that easier. But the core concepts are manageable once you understand the four primitives: state, nodes, edges, and compilation.
A few things to take from this tutorial:
- Use `from langgraph.graph import StateGraph, START, END`, not the deprecated v0.1 patterns you’ll find in most search results
- Start with `create_react_agent` for standard tool-calling agents (or `langchain.agents.create_agent` if you’re starting fresh today); switch to manual `StateGraph` when you need custom routing or multi-agent architecture
- Understand the `add_messages` reducer, it explains why message state behaves the way it does across nodes
- Never ship `MemorySaver` to production; use `SqliteSaver` locally or `AsyncPostgresSaver` for cloud deployments
- Visualize your graph with `graph.get_graph().draw_mermaid()` before debugging behavior issues
From here, the most useful next step depends on what you’re building. For multi-agent patterns including supervisor-worker architectures, our guide on multi-agent systems covers the design decisions in detail. For comparing LangGraph’s production readiness against alternatives, the best AI agent frameworks guide benchmarks options by use case. And for practical context on what developers are actually shipping, the AI agent use cases guide covers real production deployments across industries.
About the author
[Team AgentsIndex](https://agentsindex.ai/authors/agentsindex)
Editorial team
The AgentsIndex research desk publishes source-linked product research and original market analysis.
Last checked 7 November 2026
## Top of agent tools and integrations
[The category page](https://agentsindex.ai/categories/agent-tools-and-integrations)
- [ERIUS PHONE](https://agentsindex.ai/eriusphone) · The team behind ERIUS PHONE runs this listing · Cloud Android phones an AI agent drives by touch, keeping installed apps and human-done sign-ins between sessions. · From about $45 a phone a month Checked 8 Nov · Featured Free trial · [Visit](https://agentsindex.ai/go/eriusphone)
- MCP server
- API
- Open source
- Self-host
- [Base2026](https://agentsindex.ai/base2026) · The team behind Base2026 runs this listing · Free SEO research MCP server, public API and browser SEO checks with original sources attached. · Free Checked 26 Oct · [Visit](https://agentsindex.ai/go/base2026)
- MCP server
- API
- Open source
- Self-host
- [UI Discovery](https://agentsindex.ai/uidiscovery) · The team behind UI Discovery runs this listing · Library of real website and app UI sections, queryable by AI assistants over MCP and a REST API. · Free, then $15 a month Checked 20 Oct · Freemium · [Visit](https://agentsindex.ai/go/uidiscovery)
- MCP server
- API
- Open source
- Self-host
- [TinyFish](https://agentsindex.ai/tinyfish) · The team behind TinyFish runs this listing · Web search, page fetch, cloud browsers and a goal-driven web agent behind one API, with search and fetch free. · Free, then $0.002 per minute Checked 8 Nov · ISO 27001 · [Visit](https://agentsindex.ai/go/tinyfish)
- MCP server
- API
- Open source
- Self-host
- [ClineFlow](https://agentsindex.ai/clineflow) · The team behind ClineFlow runs this listing · Git-native project memory and handoffs for coding agents. · Free Checked 7 Nov · [Visit](https://agentsindex.ai/go/clineflow)
- MCP server
- API
- Open source
- Self-host
- [AgentMail](https://agentsindex.ai/agentmail) · Email inbox API that gives each AI agent its own address, threads, webhooks and MCP server. · Free, then $20 a month Checked 20 Oct · EU-hosted Freemium SOC 2 · [Visit](https://agentsindex.ai/go/agentmail)
- MCP server
- API
- Open source
- Self-host
- [Automater](https://agentsindex.ai/automater) · The team behind Automater runs this listing · Desktop tray app that indexes every local AI coding session, flags stalled agents and meters quota. · Free, then $29 a year Checked 28 Oct · Local AI · [Visit](https://agentsindex.ai/go/automater)
- MCP server
- API
- Open source
- Self-host
- All 94 AI agent tools and integrations · First paid plans from $3 to $650 a month. · [See all 94](https://agentsindex.ai/categories/agent-tools-and-integrations)
- 67 free to start
- 43 publish a monthly price
- 37 open source
- Checked 30 July–8 November 2026
[Show the whole category](https://agentsindex.ai/categories/agent-tools-and-integrations)
New AI tools, checked
Every AI tool price change we caught, each Tuesday.
[Privacy policy](https://agentsindex.ai/privacy)
## More of our research
Buyer's guide 8 November 2026
### [Best sales agents for marketing teams, and what to check](https://agentsindex.ai/blog/best-sales-agents-for-marketing-teams-and-what-to-check)
Apollo suits teams starting free, VoiceDrop suits voicemail campaigns, and PipeLime suits hands-off email and LinkedIn prospecting.
Buyer's guide 7 November 2026
### [Clay pricing: every plan, its Actions, Data Credits and rows](https://agentsindex.ai/blog/clay-pricing-every-plan-its-actions-data-credits-and-rows)
What Clay's Free, Launch, Growth and Enterprise plans cost, and how many Actions, Data Credits and table rows each one includes.
Buyer's guide 3 November 2026
### [What are the best AI assistant apps?](https://agentsindex.ai/blog/what-are-the-best-ai-assistant-apps)
Google Gemini, Microsoft Copilot and Claude lead for everyday help; Reclaim, CosVoice and Lindy suit calendars, phone calls and email.
Buyer's guide 27 October 2026
### [Workflow automation tools pricing: what you pay to start](https://agentsindex.ai/blog/workflow-automation-tools-pricing-what-you-pay-to-start)
CloudPloy has the cheapest paid entry plan and GrantCue the dearest, free plans are common, and prices jump hardest at business tiers.